Declare Interim Dividends
Learn how to declare interim dividends for the relevant company shareholders with CSP
Use the Declare Interim Dividends service request to declare interim dividends for the relevant company shareholders. The company must be enrolled on the CSP platform to request this service.
For this request, you will be required to:
- Input the appropriate dividend amount and dividend currency;
- Upload supporting documents (e.g. the Financial Statements/Management Accounts);
- Make payment;
- Sign the necessary documents, including the dividend vouchers and resolution.
How to start
You can start the Declare Interim Dividends request at any time from the New Request page. The service request is a part of the Company Administration Services services category.
Learn more about how to Start a New Service Request.
Step-by-step Instructions
Initial Inquiry
In this step you will be asked to provide information on the currency of dividends, the total amount of dividends declared, and upload supporting documents such as a profit and loss statement (P&L) or Balance Sheet.
You are not required to complete the form to SUBMIT the request to the staff if you have any questions. However, you must meet all the required information to move to further steps.
See below the main sections displayed on this step.
Instructions
The Instructions section will guide you on what is required from you at each step of the service request.
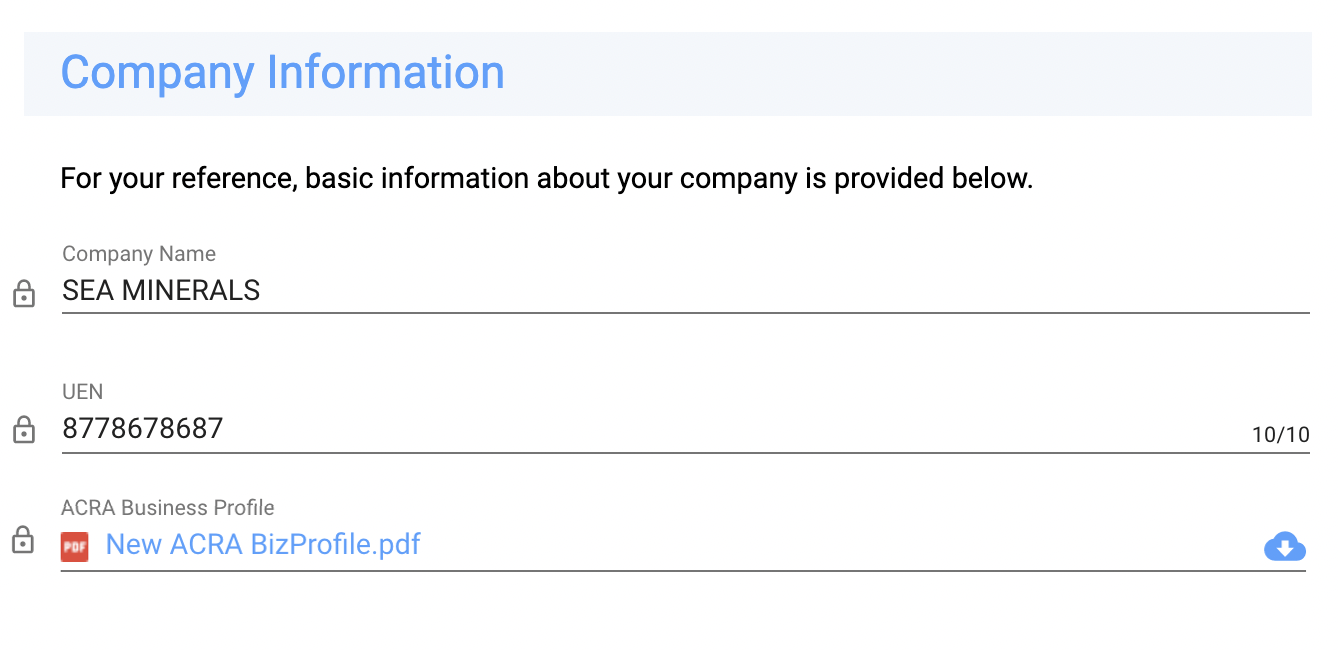
Company Information
For your reference, your Company Name, UEN, ACRA Business Profile are displayed in this section. You can download any of the attached documents by clicking on the  icon.
icon.

To view the complete company profile and all associated documents for all your companies that are enrolled on CSP, select the My Companies link in the left navigation menu.
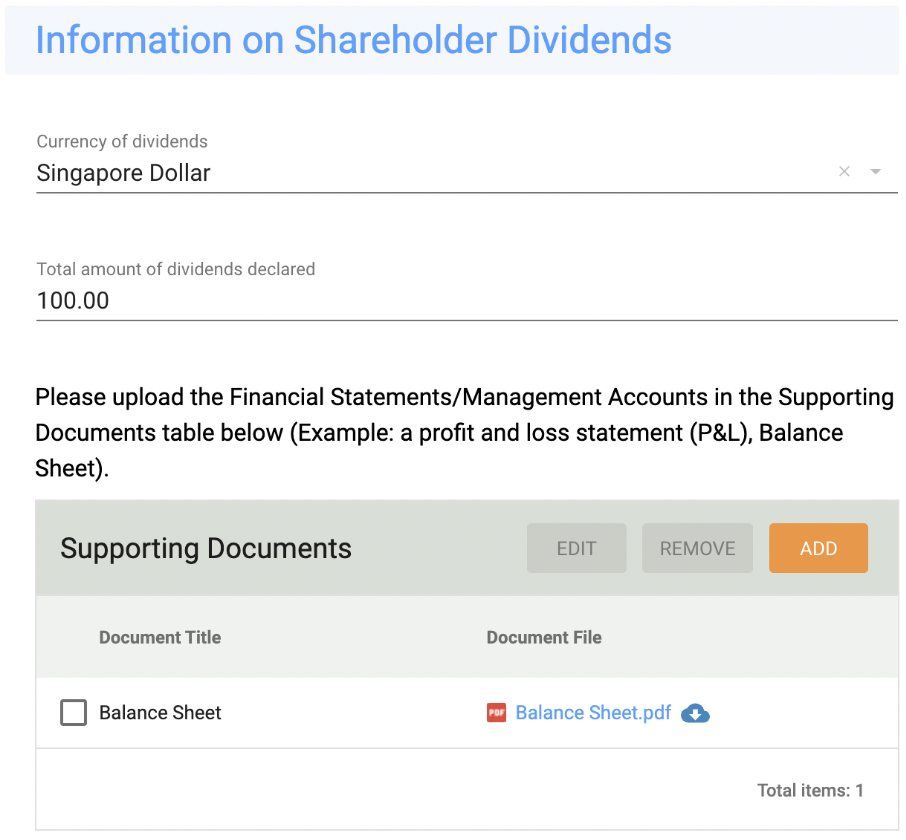
Information on Shareholder Dividends
In this section, you will be asked to choose the currency of dividends, input the total amount of dividends declared, and upload supporting documents in the ‘Supporting Documents’ table.
Click on the ‘Add’ button in the upper right corner of the ‘Supporting Documents’ table to open the ‘Add New Supporting Documents’ pop-up as shown below. Here, you will be asked to upload a profit and loss statement (P&L) or Balance Sheet.

Check Data For Completeness
Use the CHECK FOR COMPLETENESS button to ensure that you have provided all the required information to process your request. The system will show you the list of missing data if any.
Have Questions?
If you have any questions about this service request, you can exchange messages with the CSP Service Delivery team using ![]() icon.
icon.
The staff member will review and respond to your questions. Read more on how to send and read messages
When you are done with the form, SUBMIT the request to the Service Delivery team. Staff will reply to any questions you may have and assign the request back to you at this same step. This back-and-forth communication can continue as long as required until all your questions are answered, and you are ready to move further.
Review Inquiry
After you submit the request, the staff member will review the information you provided. The staff member will answer your questions (or provide additional instructions) in the Messages icon. Learn more about how to communicate with the staff member in CSP. If the staff member requires any clarifications, the request will be assigned to you. You will be notified by email when the request is assigned back to you.
Make Payment
Once all the necessary information has been received, you will receive an email with the link to complete the payment for the service request. It will take you to the My Payments page where you can pay for the outstanding service using the "Pay Now" button.
Learn more about how to make a payment for your service request.
Pre-signature Review step
The system will generate the "Resolution for Declaration of the Interim Dividends" and "Dividend Voucher(s)" documents that need to be signed. The staff member will review the documents for accuracy. After the review, the staff member will send the service request to you to sign the documents.
Sign Documents Step
On this step, all signatories will be requested to sign the documents electronically.
Learn more about how to Verify Identity of Signatories and to Sign Documents Electronically to complete this step.
The request will automatically move to the next step after all signatories have electronically signed the documents.
If you require assistance, press the Require Assistance button to move the request to staff or use the conversation widget for communication.
Review Signed Documents Step
The staff member will review the signed documents for accuracy.
If the staff member requires additional information, the request will be assigned to you at the Sign Documents step.
Final QA Step
In this step, the staff reviews and verifies the full information for this service request. If everything is in order, the request will be moved to the next step.
Close Workflow Step
The services you requested have been delivered, and this request is now ready to be closed. The completed service requests will be shown in the Closed tab of the "My Inbox" page.
Updated 10 months ago
