
Workflow Cancellation, Refunds
Learn how to cancel a workflow and provide a refund to the client
Cancellation Overview
The workflow cancellation process involves two steps: initially, the staff or client user submits the workflow to the cancellation queue, and subsequently, an admin staff member approves the cancellation from the Cancellation Requests List page.
Cancellations can be initiated by clients at the start of most workflows, except for a few specific cases such as incorporating or transferring a company, intiating annual compliance tasks. Afterwards, the "Cancel" action button is displayed only to staff users.
If a client or staff user wishes to cancel a workflow, they can do so by opening the service request that is assigned to them and clicking the "Cancel" button displayed in the upper left corner of the workflow form. It sends the workflow into a cancellation queue. Here, an admin staff users with the appropriate permissions review and approve or reject the cancellation from the Cancellation Requests List.

For staff, it's important to note that once a workflow is in the cancellation queue, there are several markers that help to distinguish the workflow in the cancellation queue from an active workflow:
- “Cancellation Requested” label on a worklfow in the "My Inbox" page.
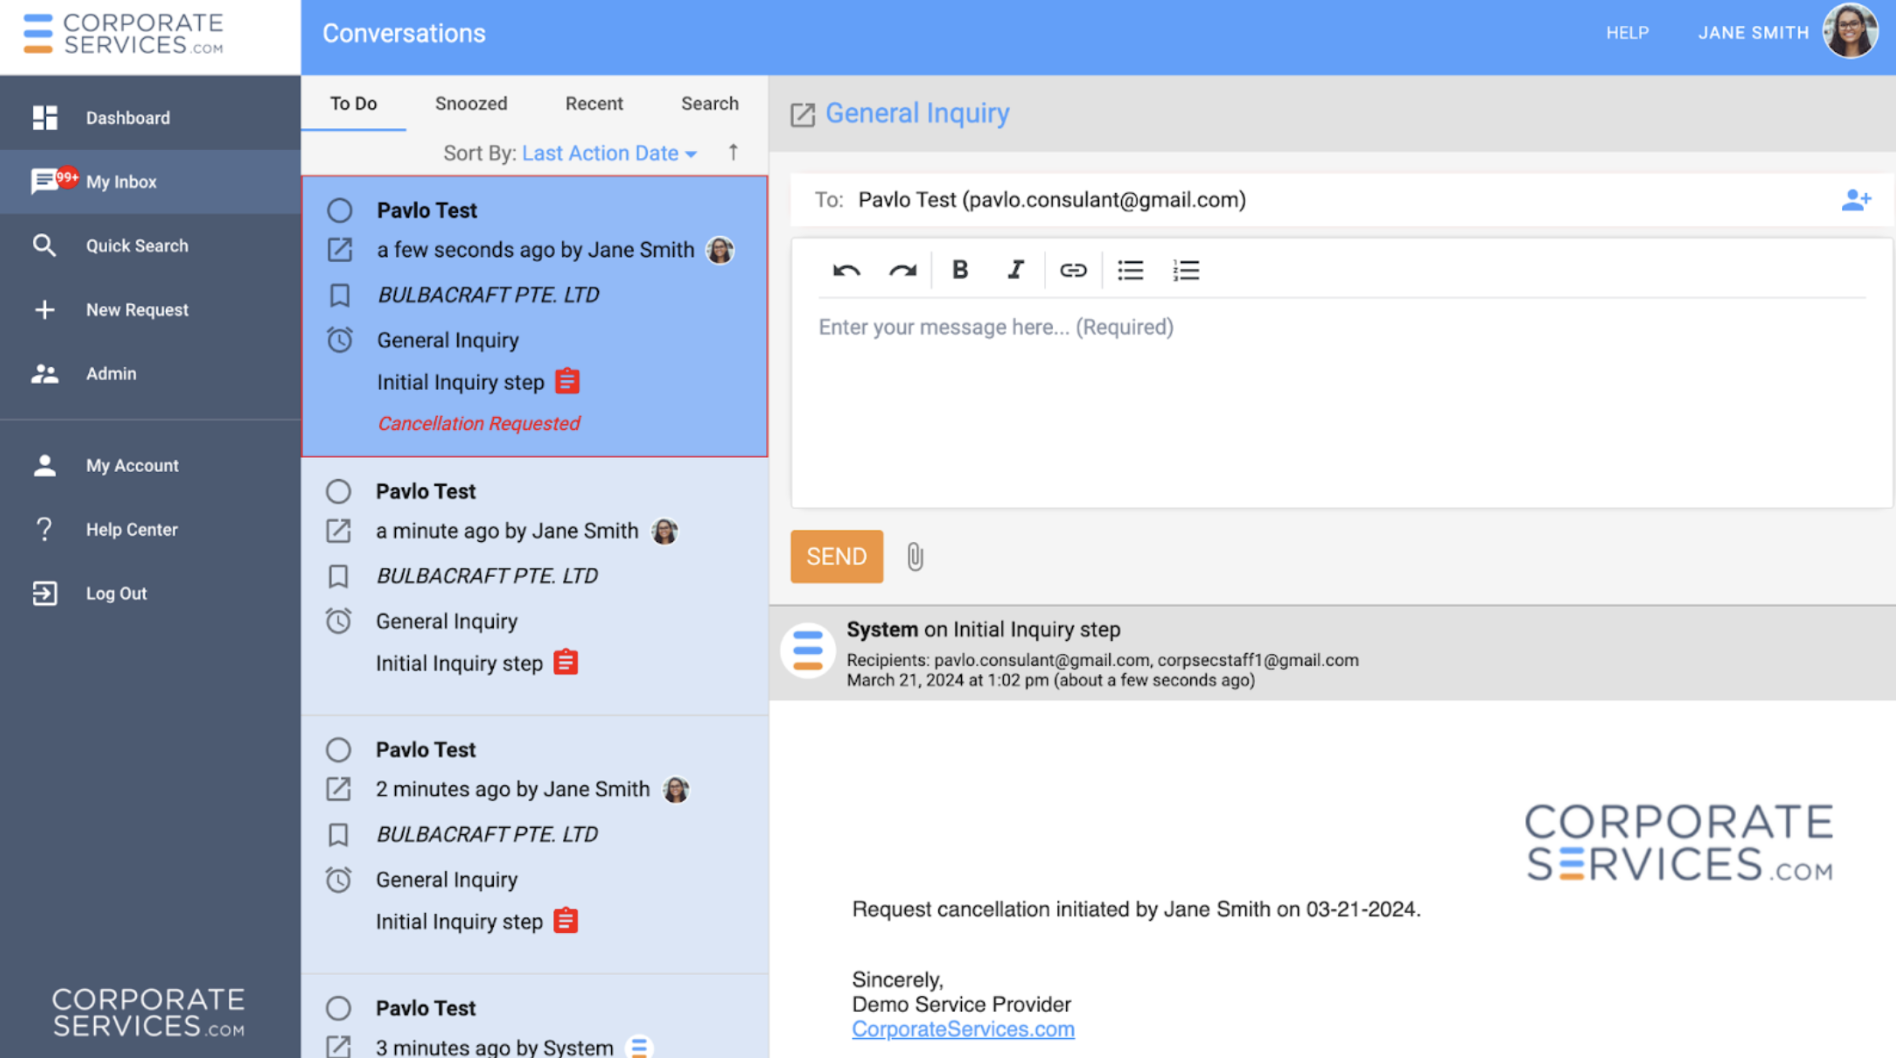
- When the workflow is opened, the user will find the "Cancellation Requested" text in the "Note" field. Furthermore, no action buttons will be visible for such requests at the top of the workflow form.
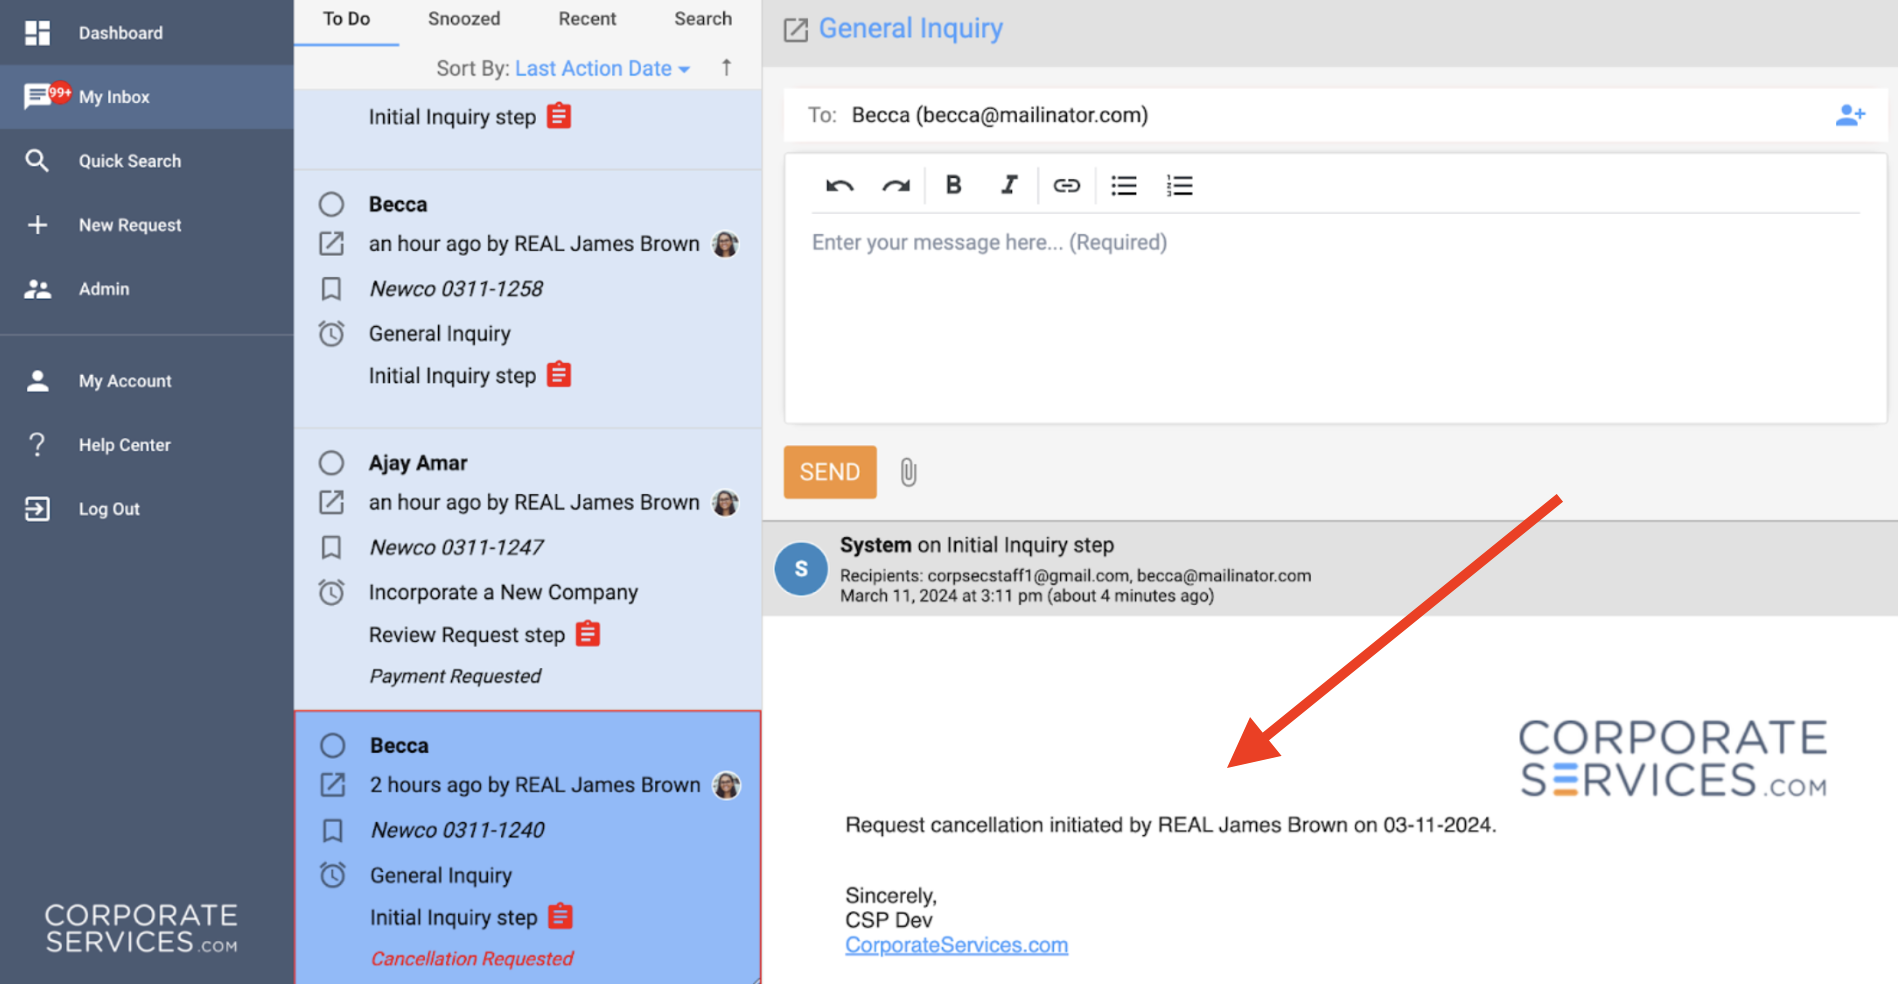
- The conversation thread of the workflow will display the "Request cancellation initiated by [User Name] on [Date]." message, which is sent as soon as the workflow is moved to the cancellation queue.
Messaging and payment functionality for workflow in the cancellation queueEven after a workflow is queued for cancellation, messaging functionality remains active, allowing continued communication with the client. However, the payment functionality has limitations; while requesting, adjusting, and making payments are still possible, it is not possible to add additional items to the Shopping Cart.
Approval and Rejection of Cancellations
Once the request is sent to the Cancellation Queue, it will be displayed in the Cancellation Requests List available under Admin - Workflows - Cancelled Workflows.
When a workflow in the "Cancellation Requested" status is accessed from the "Cancelled Workflows" admin widget, all form fields will be read-only. However, at the top, an admin user would see the action buttons "Reject Cancellation Request", "Approve Cancellation Request", "Previous", and "Next".
Rejecting a Cancellation: If the cancellation doesn’t meet the required criteria, it can be rejected using the "Reject Cancellation Request" button. This returns the workflow to active status. An email about the cancellation rejection gets sent to all conversation participants through the workflow's conversation thread.
Approving a Cancellation: When no payment was made in the workflow, approving the cancellation is straightforward. The workflow can be canceled by clicking the “Approve Cancellation Request” button. Once the cancellation was confirmed in the "Approve Cancellation Request" popup, the status of the workflow gets changed to “Terminated” and it will be removed from the My Inbox and Cancellation Requests List pages. An email about the cancellation approval gets sent to all conversation participants through the workflow's conversation thread.
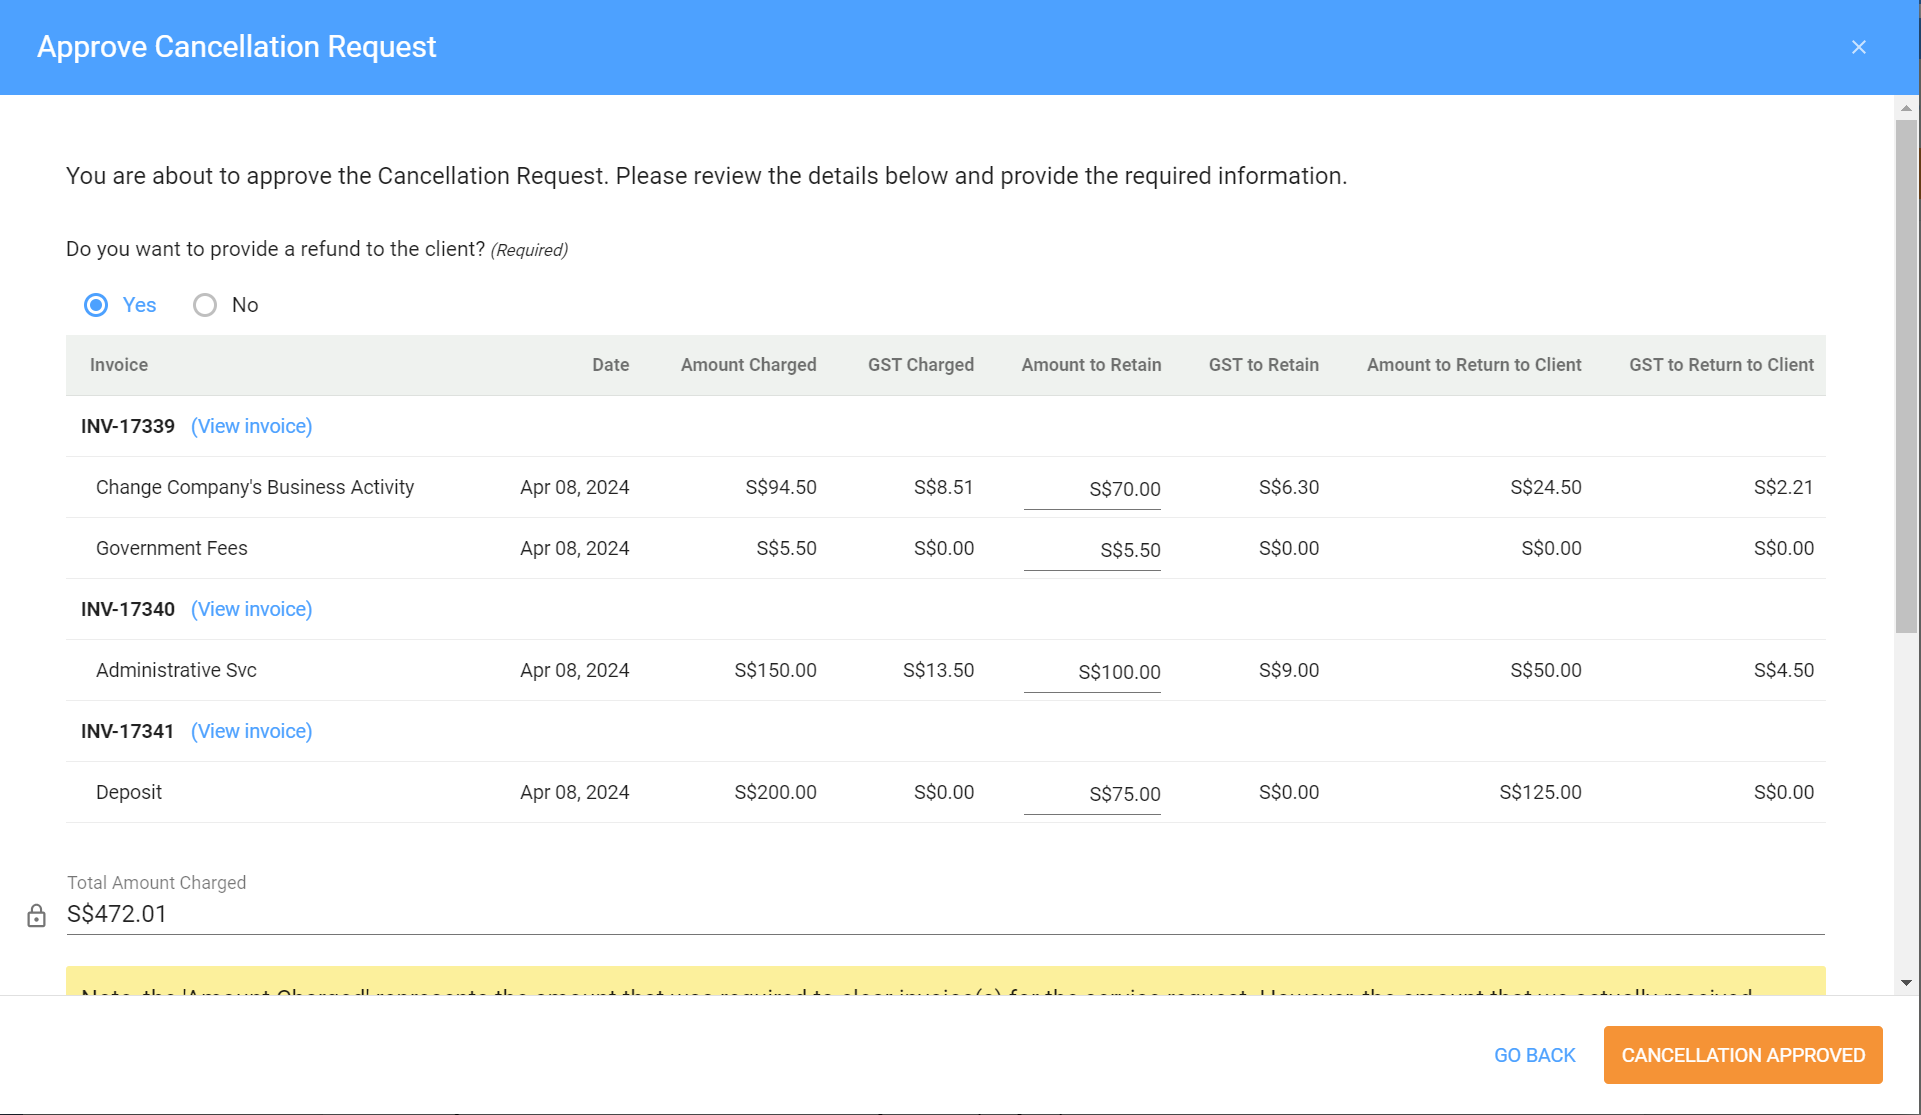
If a payment was made in the workflow, in the "Approve Cancellation Request" popup, the staff first needs to determine if a full, partial, or no refund should be issued (see pic. below) based on company policies and specific circumstances. The popup shows a table with payment details such as the Amount Charged, GST, Date etc. If the staff opts to provide a refund, additional fields become active to specify the amounts to be retained and refunded. These fields help calculate the final amount that will be credited back to the client. The subsection below explains the different refund options available.
Refund Options Available
Full Refund: To provide a full refund, select "Yes" on the radio button labeled "Do you want to provide a refund to the client?" Set the "Amount to Retain" for each line item to "0." The system will then calculate the total refund amount, including GST. Upon cancellation approval, this amount will be credited to the client’s eWallet. In Xero, a Credit Note will be issued for the full amount initially charged, and no new invoice will be generated.
Partial Refund: To provide a partial refund, select "Yes" as an answer to the radio button labeled "Do you want to provide a refund to the client?" This action allows you to specify an "Amount to Retain" for each line item present in the invoices paid within this workflow.
It's important to note that an "Amount to Retain" must be specified for each separate line item that received a payment, as all other values will be automatically calculated by the system. Refer to the pic. above for clarification.
Once a partial refund is confirmed, the system calculates the "Total Amount to Return to the Client" and credits it to the client's eWallet balance. In Xero, a Credit Note is issued for the total amount initially charged from the client, and a new invoice is generated to reflect the final amount retained from the client in the system.
No Refund: If you choose not to provide a refund to the client for this service request, select "No" as the answer for the radio button labeled "Do you want to provide a refund to the client?" In this scenario, the "Amount to Retain" field will be automatically filled with values from the "Amount Charged" field, and all other calculations will be applied automatically. Once the cancellation is confirmed, no funds will be returned to the client's eWallet balance, and no changes will be made in Xero.
Email NotificationOnce the cancellation is confirmed or approved, an email confirming the approval or rejection of the cancellation is sent to all conversation participants via the workflow's conversation thread.
In case you choose to provide a refund to the client, an additional sentence will be included in the email body, informing them about the credited amount to the client's eWallet balance. See pic. below.

How Refunds Are Processed in XeroAfter confirming the refund (whether full or partial), the system generates a credit note to adjust the revenue previously received. For partial refunds with retained funds, a new invoice is issued to reflect the final amount retained upon cancellation approval.
The calculation of GST for refunds after the update on Jan 1, 2024
Due to the GST update, if there is a need to provide a partial refund for an invoice that was paid before January 1, 2024, and the applicable GST rate was charged (e.g. 8%), please submit a request to the CSP Help Desk Center. A tech support specialist will manually issue a credit note for such a refund to make sure the calculation of GST is correct everywhere (in CSP and Xero).
Note, that you can still use the Approve Cancelation functionality in CSP to provide a partial refund for invoices paid after January 1, 2024, or where GST wasn't charged before.
Updated about 1 year ago